Rough in & linings (electrical, plumbing rough in, insulation and plasterboard)
Fix-out and finishes (cabinetry, tiling, painting, flooring & fixtures)
Completion & External works (final fit-off, defects, paving, driveways, landscaping)
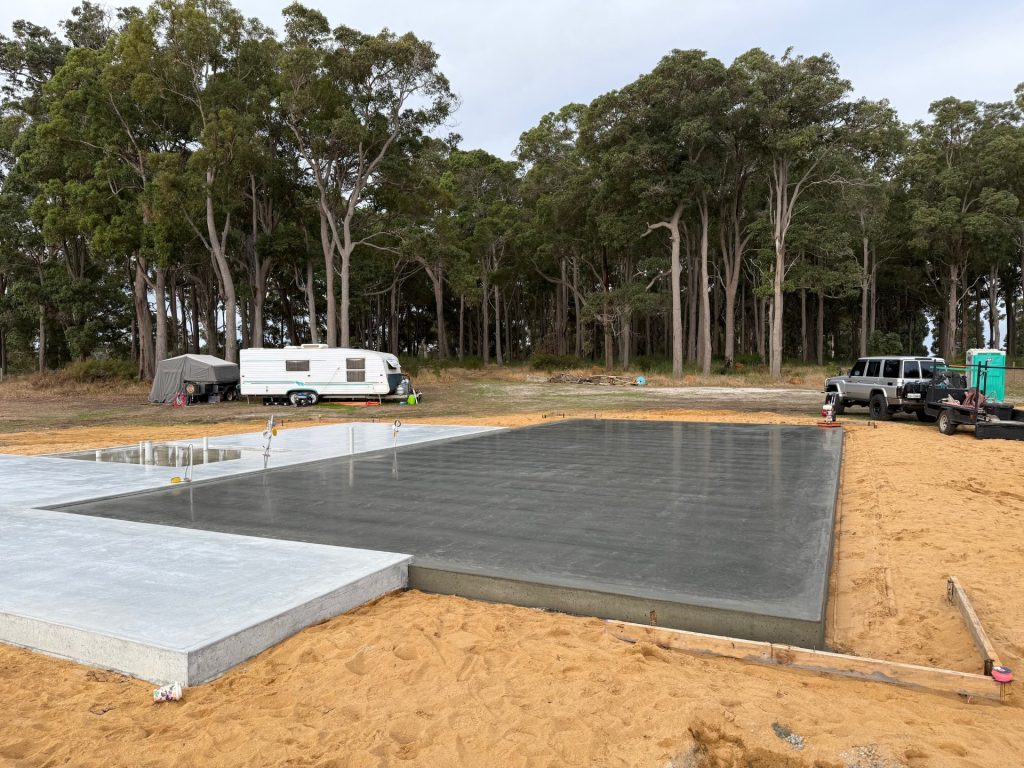
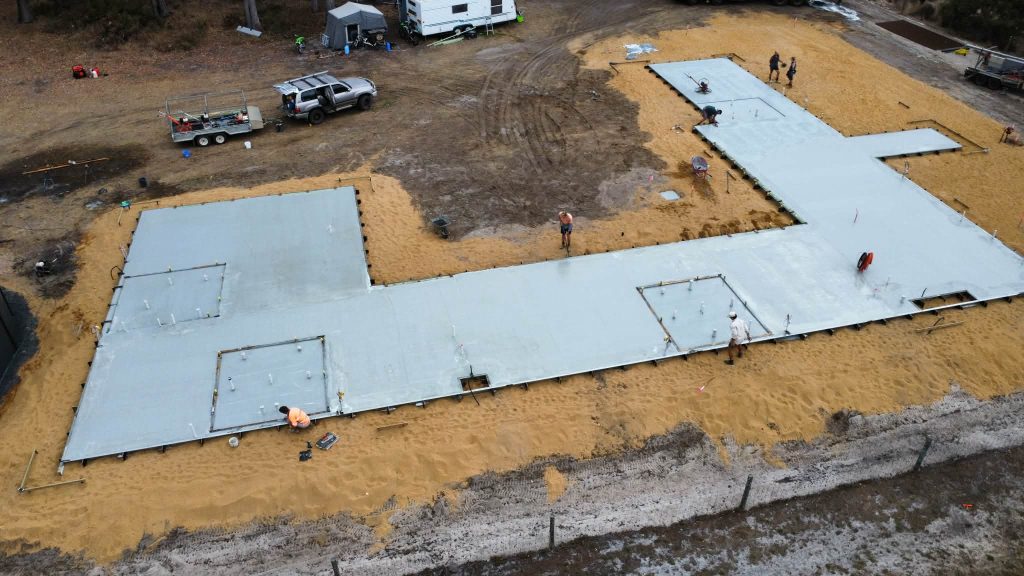
Our slab was poured into two sections, the house slab which is 372 m2 and the garage slab which is 138m2. The garage slab is a step down from our house slab and it is standard concrete colour whilst we added colour to our house slab as will be having polished concrete floors.
Colour-Polished Concrete Slab
We chose to add colour to our house slab but not our garage slab. The colour we added was the Holcim pewter. Interestingly the garage slab is normal concrete colour, it’s greyer and you can feel the difference in temperature on your feet walking over the slabs The garage slab is a lot hotter than the house slab.
Love this photo which really showcases the difference in colour. The first one immediately after the garage was poured and the colour got lighter as it cured and dried.
Comparison of standard concrete colour (grey slab on RHS) with concrete that has white ‘pewter’ added prior to pour (white slab on LHS). Image on the LHS was shortly after the pour, concrete still curing and drying, image on the right is the end result.
Top Tip
If you plan to add colour to your slab, have polished concrete floor ensure the sand is whitewashed sand as the sand colour impacts the result. You can see the sand colour in our picture above the whitewashed sand is technically yellow, but it’s not as dark as the typical builder sand. Would need to ensure the earthwork company is aware of this requirement ahead of time.
The Process
Survey
Earthworks/ Termite Spray
Electrical and Plumbing
Termite Collars
Formwork
Underfloor heating
Pour
1. Survey
The area was surveyed and the concrete pad dimensions were marked out.
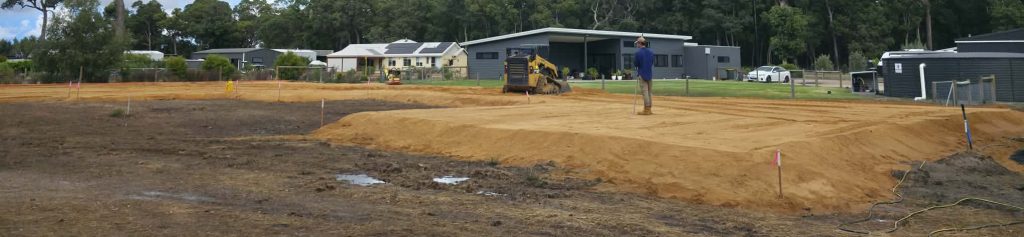
2. Earthworks
Earthworks, the ground around the pad was cut removing the top layer and then filled with sand to create the base of the pad. The pad was compacted and a compaction certification was received. The slab is also sprayed for termites.
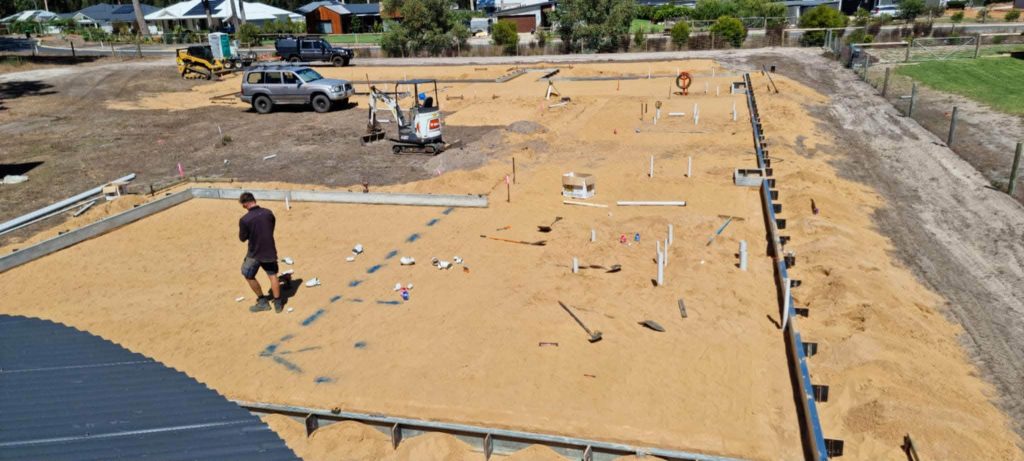
3. Electrical and Plumbing
All under-slab services are installed next, including plumbing pipes, electrical conduits, and any drainage. Tip is if you want power in your island bench ensure an electrical cable is run there prior to the slab being poured. Same for in -floor power points.
4. Termite
The termite collars were put on the services all the pipes they are blue sticky material that stops termites climbing up the service pipes.
5. Formwork
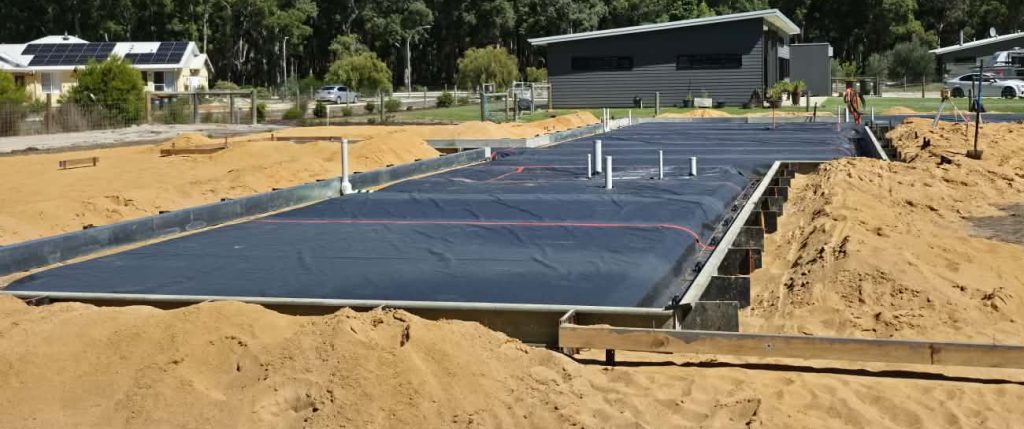
The formwork was then completed by the concreters, including vapour membrane, mesh and in-slab insulation added.
6. Underfloor Heating
After the mesh of the formwork was on the electric underfloor heating was installed, they effectively tied the wires to mesh in the living areas, the bathrooms were not done, they are done after the slab has been poured, prior to tiling.
7. Pour
The slab was poured we were lucky that it was a cool day and rained in the afternoon, our concreters recommended spraying the slab with water to slow down the curing process as if it is a hot day and dries quickly can cause cracks which is not ideal for polished concrete floors.
8. Waterproof/ Parge Slab
We used the Crommelin waterproofing seal, once the slab was cured this was painted on the side of the slab. You can get this from Bunnings. We went with the option with high UV exposure as although we will be concreting a footpath around the slab later (with termite chemical management) this won’t be done for a while, realistically a year or two so would be exposed in the meantime and I did not want to do this job twice. We painted two coats.
How Expensive is Polished Concrete?
Our full costs can be found “here” keep in mind that we had a thicker slab and added colour.